
molding + casting a chess piece
I am very much against the idea of making something just for the sake of making something. It seems extremely wasteful to me, and is one of things I enjoy less about ‘maker culture.’ Therefore, I feel the need to disclaim that this was an assigned class project, and not some useless trinket I went and made of my own accord.
(The Evangelion pic in the header was what was originally posted on the [class name redacted] blog. I thought it was funny so I’m keeping it)
Hey everyone, it’s Brian again.
For our [class name redacted] final project, Adulfo and I were assigned to make a molded chess piece (knight). While much of the class chose some interesting and intricate designs (cough cough Adulfo and his sea dragon), I decided to take a ‘counterculture’ approach and to make my piece as janky, memey, and intentionally bad as possible.
I’d like to say my decision to make a knight was inspired by Monty Python’s Kniggits gag, but it really wasn’t. I wasn’t even in class when groups and pieces were assigned; was busy playing hooky instead. But here is the video anyway. It’s pretty hilarious.

I found a “Knight Chess Piece” by someone named Kainutz on Thingiverse and immediately wanted to use it for my project.
Not to bash Kainutz at all, but the ‘horse’ looked more like a duck and I couldn’t look at the design without dying.

Just imagine this beauty looking through your bedroom window in the middle of the night.
Also (to my endless amusement), the mouth piece wasn’t even aligned.

As instructed, I imported the file into meshmixer to slice it in half.
I would have just used Solidworks, but the instructor was very insistent. Probably to cover up the fact that he doesn’t know how to use it LOL

And then into the world of Fusion360 to do some preprocessing and CAM stuff!
I eventually lost patience with the software (seriously, cloud-based CAD? What were they thinking??) and rebuilt the file in Solidworks instead.
Solidworks beats the pants off of Fusion any day 😤

My (even further) simplified version of Kainutz’s knight piece.
I hadn’t used SW in a while, so this was a good refresher! Even though this simple geometric piece probably used less than 1% of the software’s full potential hahaha

Added a rectangular enclosure, alignment tabs and holes, and a fill nozzle (for eventual casting!).
I optimized the CAD a few times after this, shrinking the enclosure size to reduce cut time, and resizing/repositioning the tabs and holes accordingly.
The fill hole was also too small, but instead of enlarging the hole in CAD, we opted to cut into the actual silicone of the mold.

The instructor insisted on us using Fusion 360 to create the CAM (Computer Aided Manufacturing) toolpaths.
I said ‘no’, so Adulfo kindly took care of this part.

We were told to glue sheets of blue foam together for our positive cut.
I saw many people trying to saw through the foam with box cutters, but the real trick to clean cuts is to score the surface and break through the rest of the board with a karate chop or something.
Also feat. Adulfo’s beautiful Blowfish-in-a-Bag art! <3

The glue layer in between the foam turned out to be a huge problem.
Since the base of our chess piece was 1.5 inches across, our enclosure and cuts needed to be at least to that depth in the foam.
However, the glue gummed up the bit when it cut through, and the resulting glue+bit combination spinning around at speed shredded the rest of our foam positive.

Looks like we weren’t the only group to have this problem. This was another group’s cut, for a noticeably more *normal* chess piece.
There was no possible way to get the foam to be one continuous piece, since there is a layer of hot glue between them, and hot glue has thickness. Unless you didn’t glue the inside faces and only did the outside edges… Hmm.
Well anyway, that’s the last time I’ll ever listen to the instructor’s directions again - screw that.

It was time to take matters into my own hands.
I jigsawed some 4-inch segments of 2x4 to carve instead.
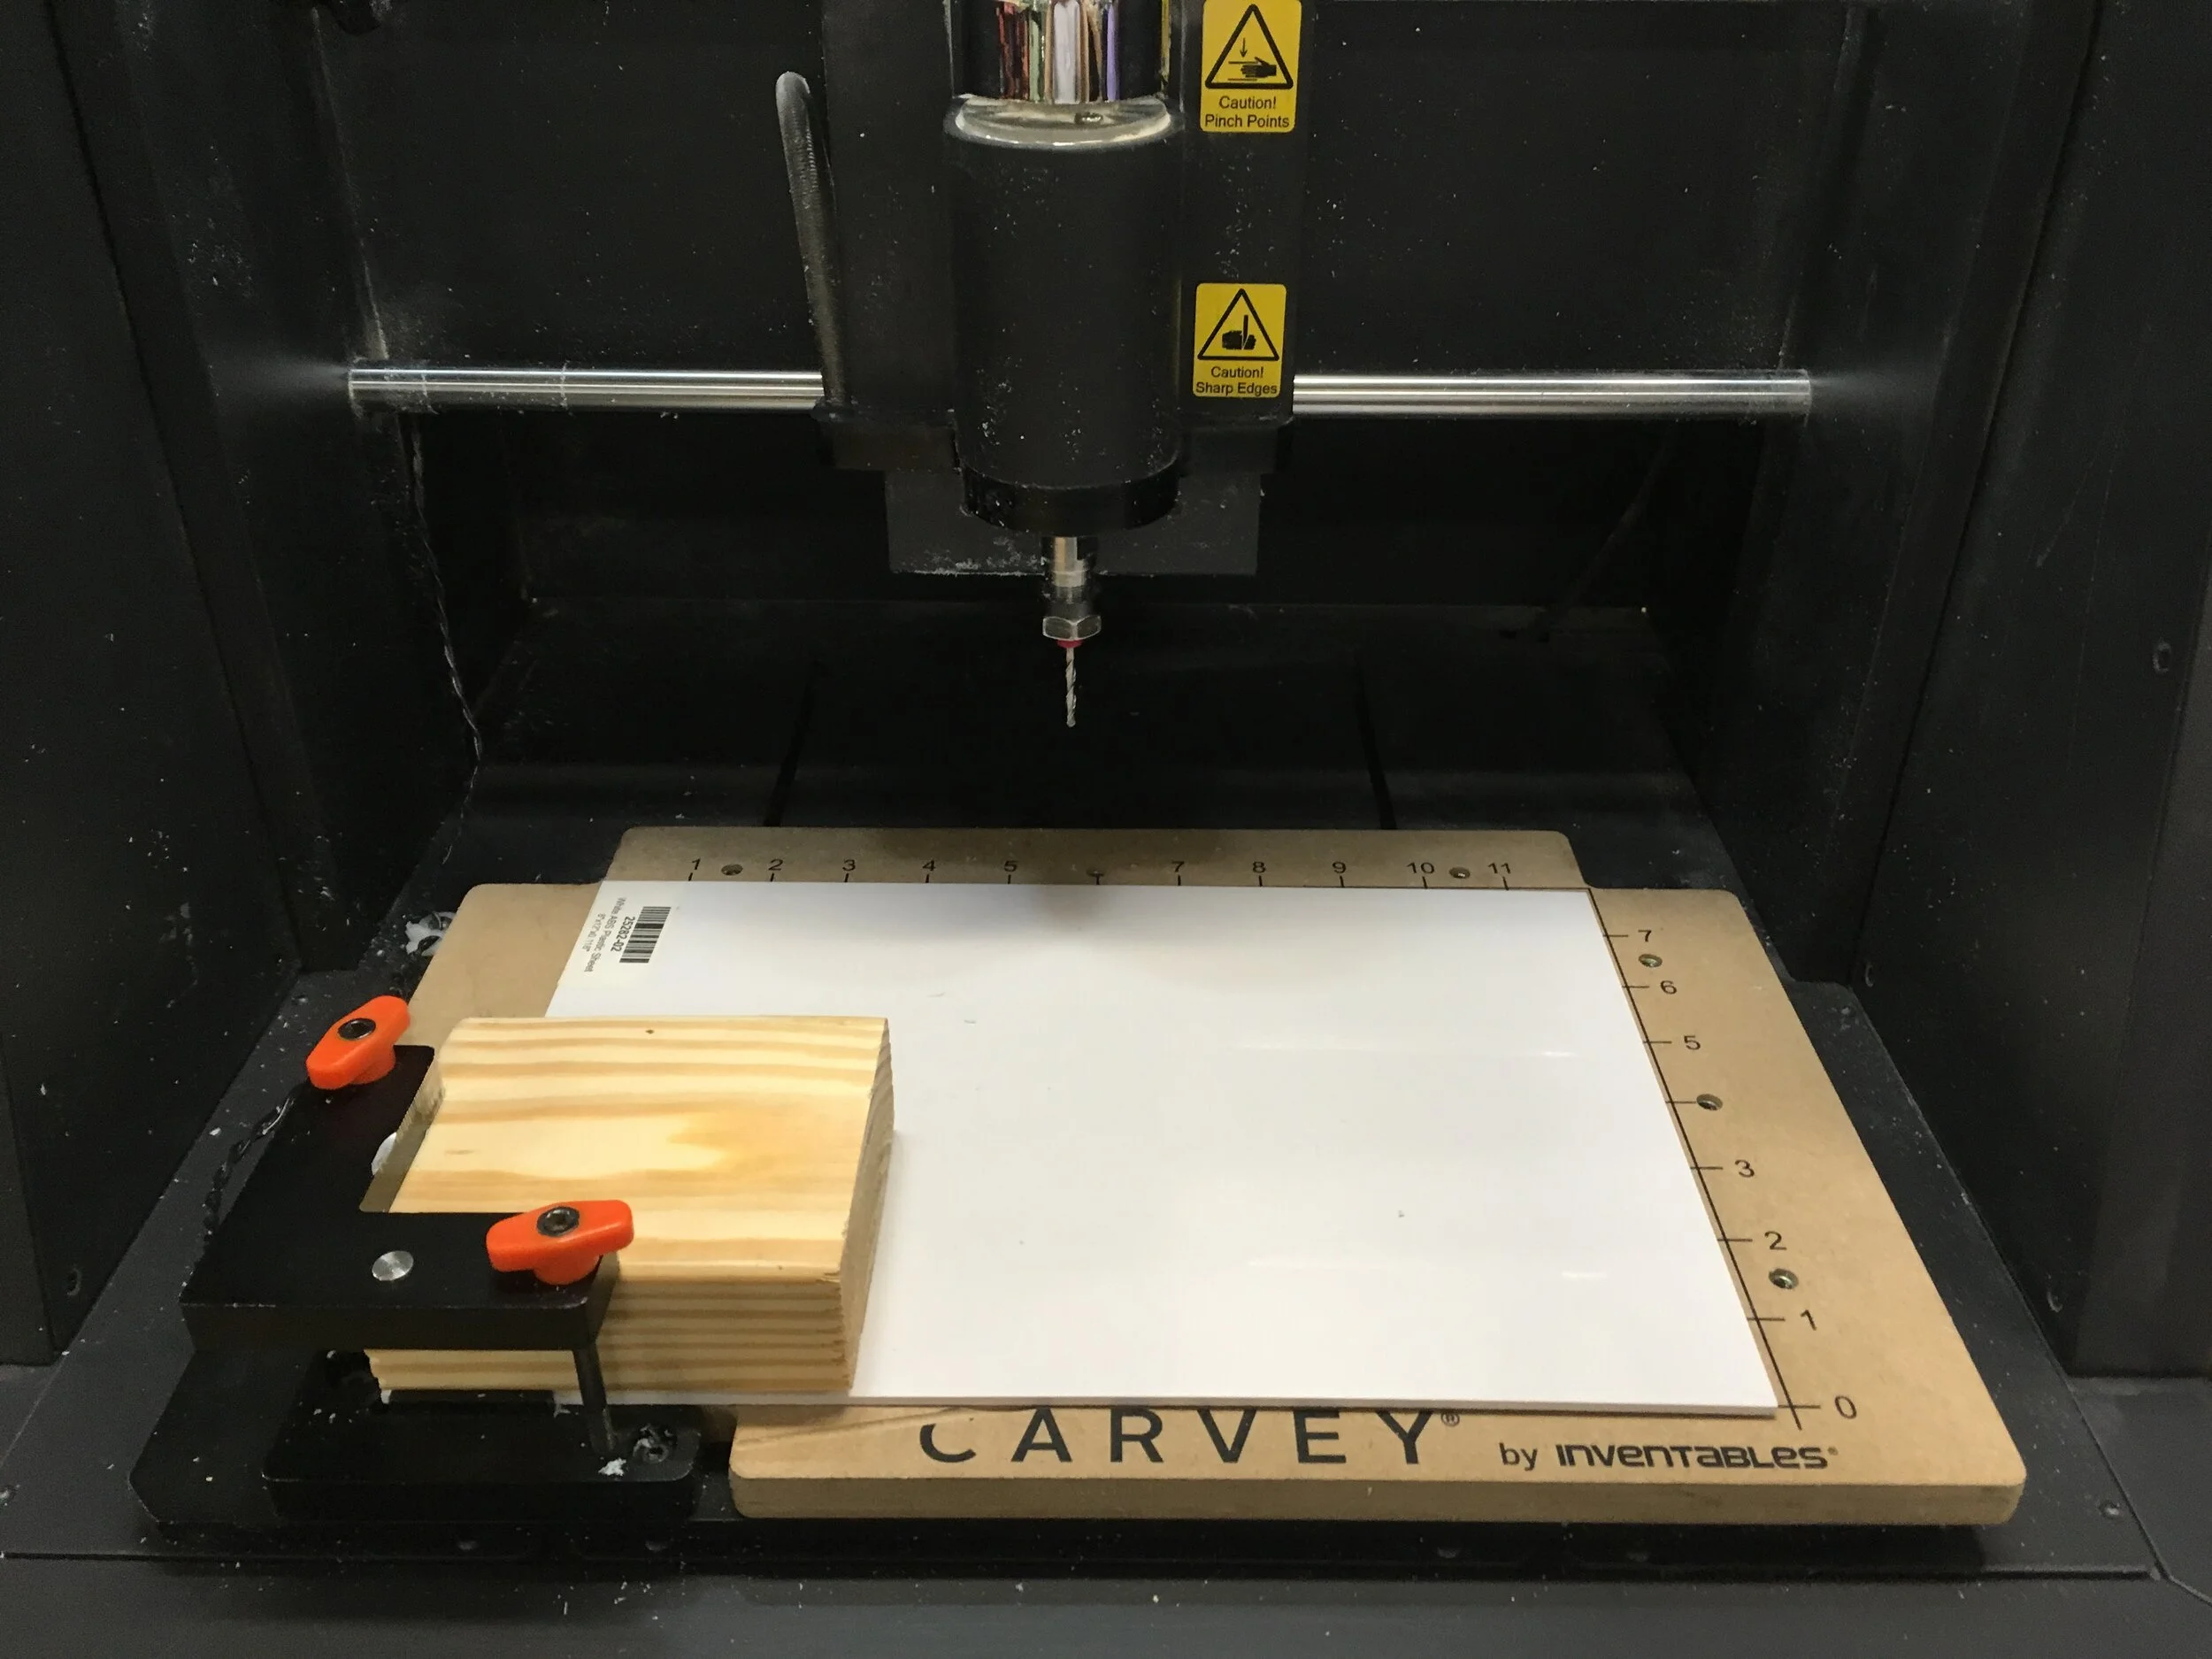
The orange thumbscrews were too long to secure the wood in carvey’s work plane, so we wedged some ABS sheet under to make up the difference. All our cuts were done with an 1/8″ ball end bit.

Cutting off the excess wall material after the carve. While the walls were fine, we wanted to make taller walls to have a thicker mold that wouldn’t buckle when clamped.

Ready for casting the negative! Also, the alignment holes Carvey cut were too small, so I drilled them out to the correct size with a 1/4″ drill it.
While we also intended to do another pass with a 1/16″ bit to improve the resolution, we decided a quick hand sanding job to kill the contouring was enough.

\
Because I didn’t really think about the mold buckling when I created my CAD model, the top of the knight’s mane was really close to the top of the rectangle, which would mean the mold being incredibly thin at that point.
To work around this, we just glued some foam to extend the top of our piece.

Creating the infamous box

Next, I filled said box with nuts, to approximate the volume of our mold.
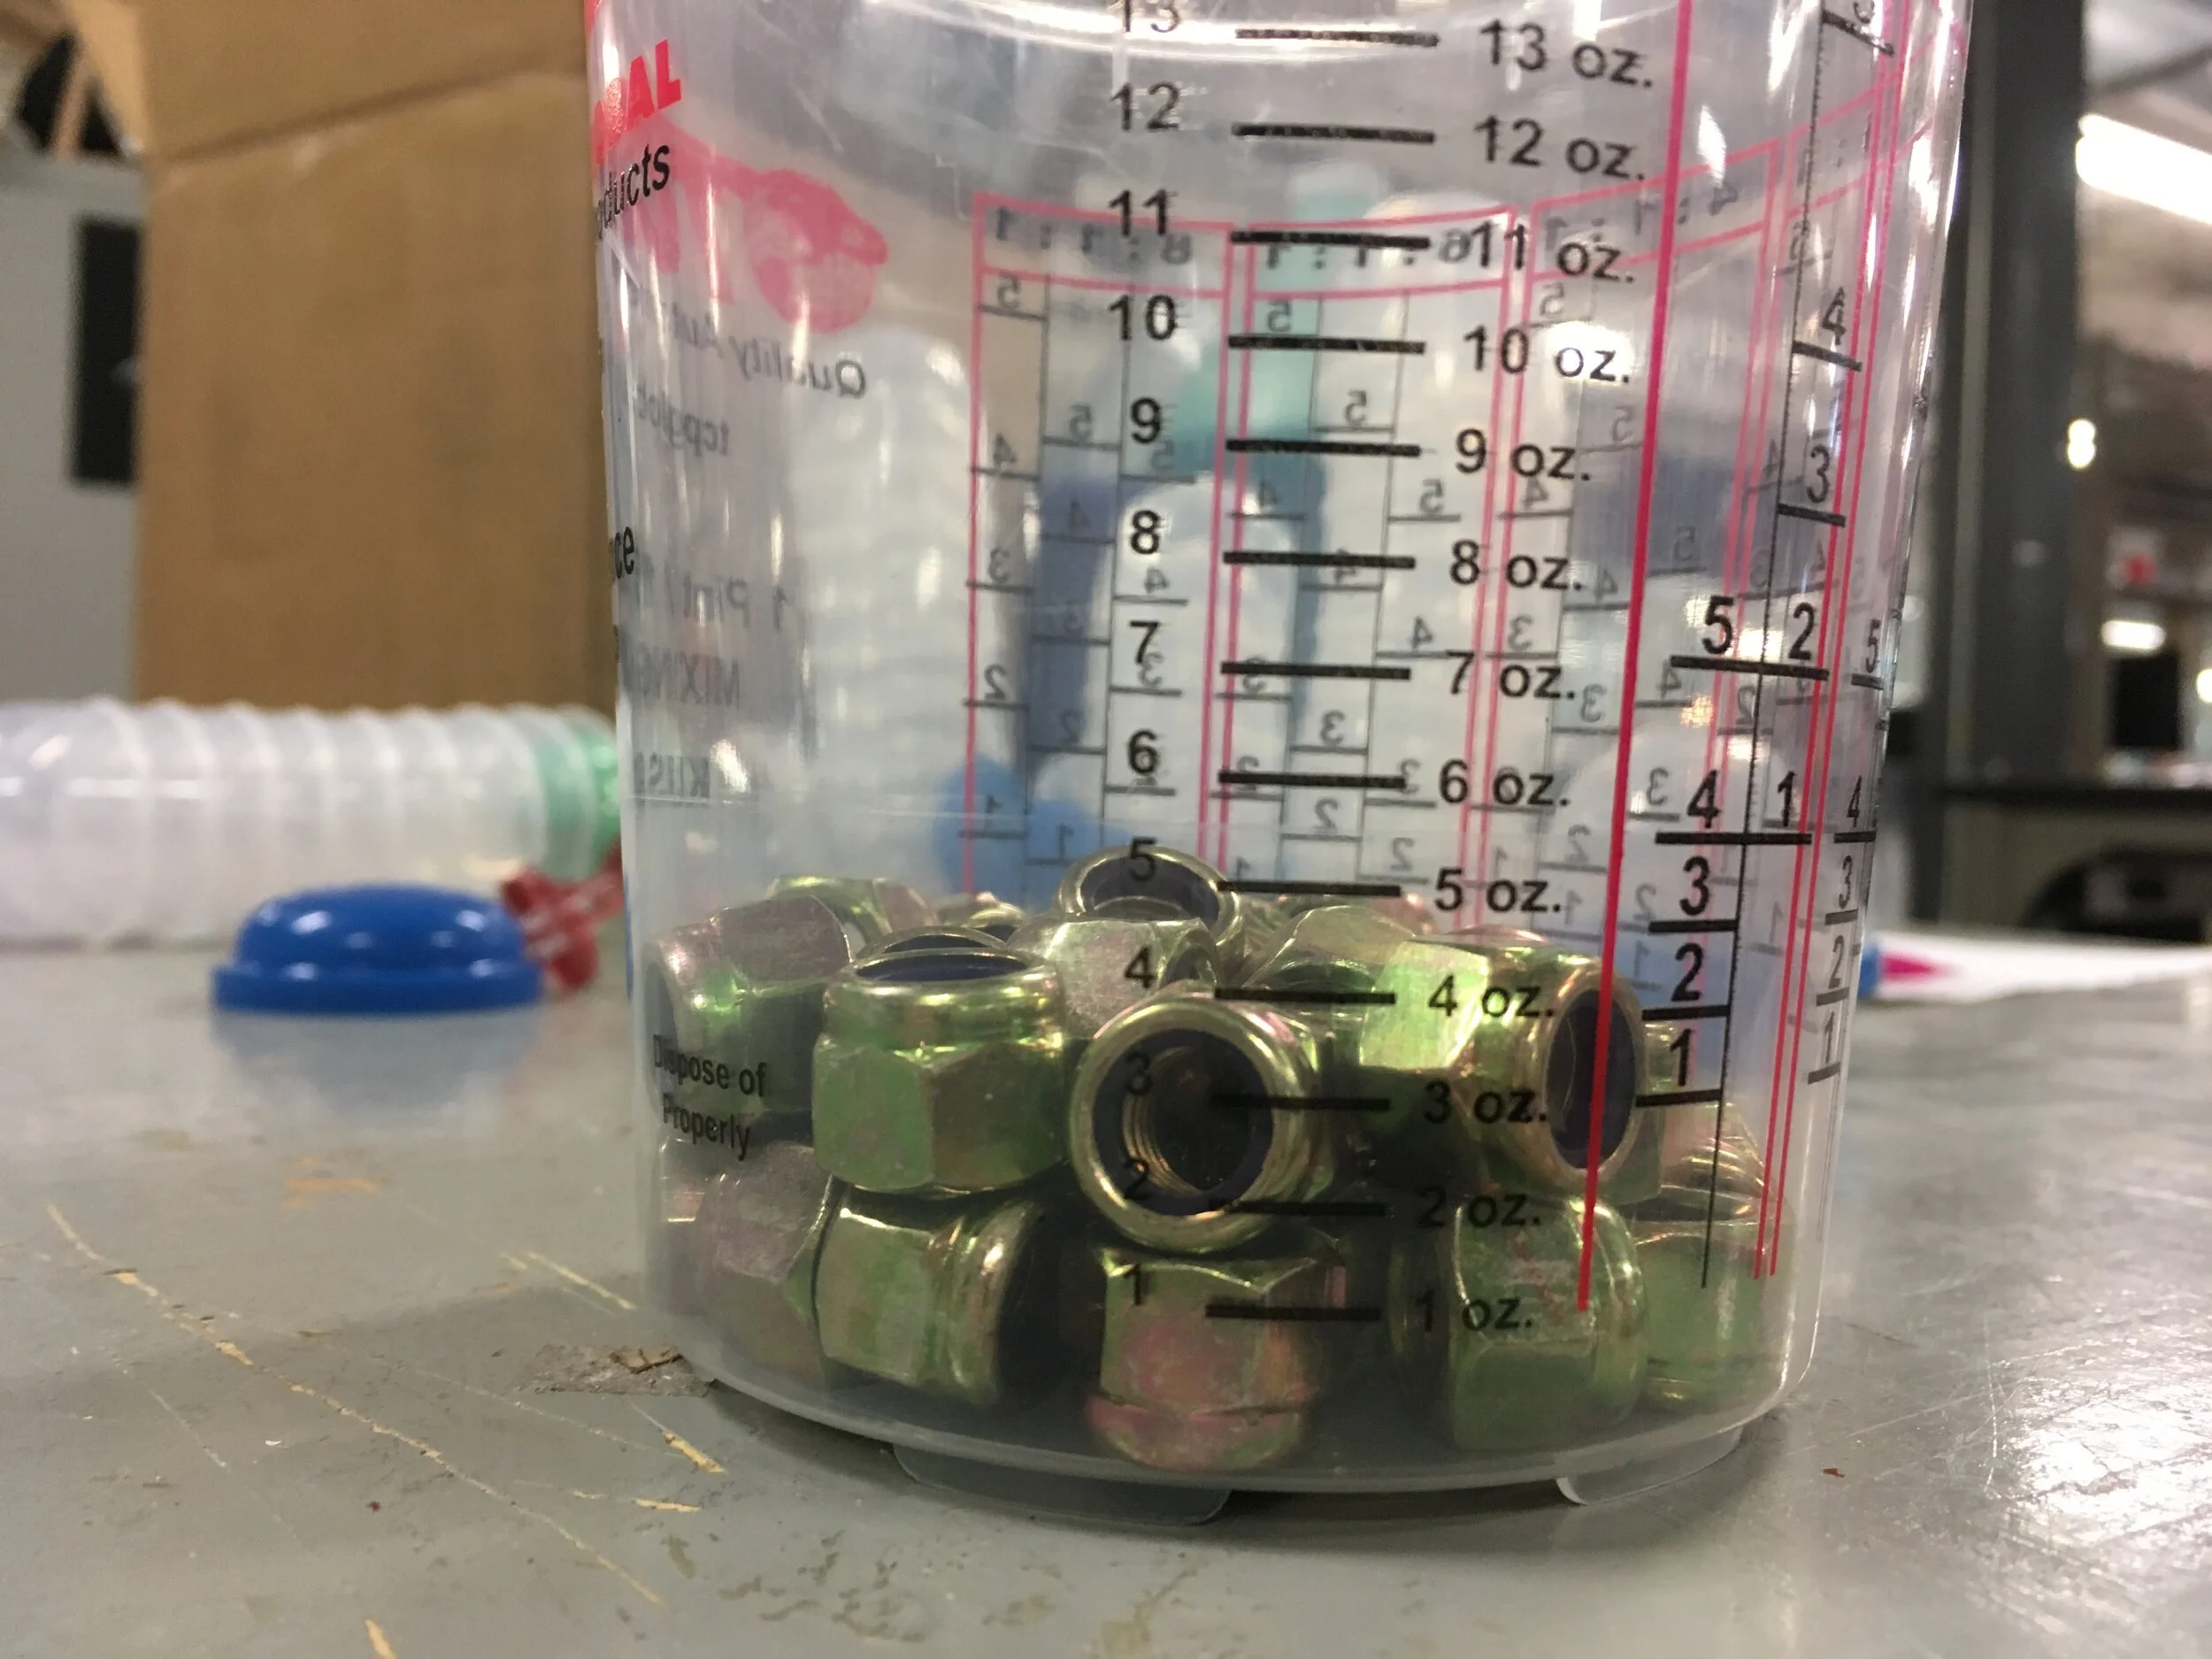
Came out to be between 4 and 5 fluid ounces.
In the future, I plan to use airsoft pellets and their smaller size for greater resolution + higher volume accuracy.

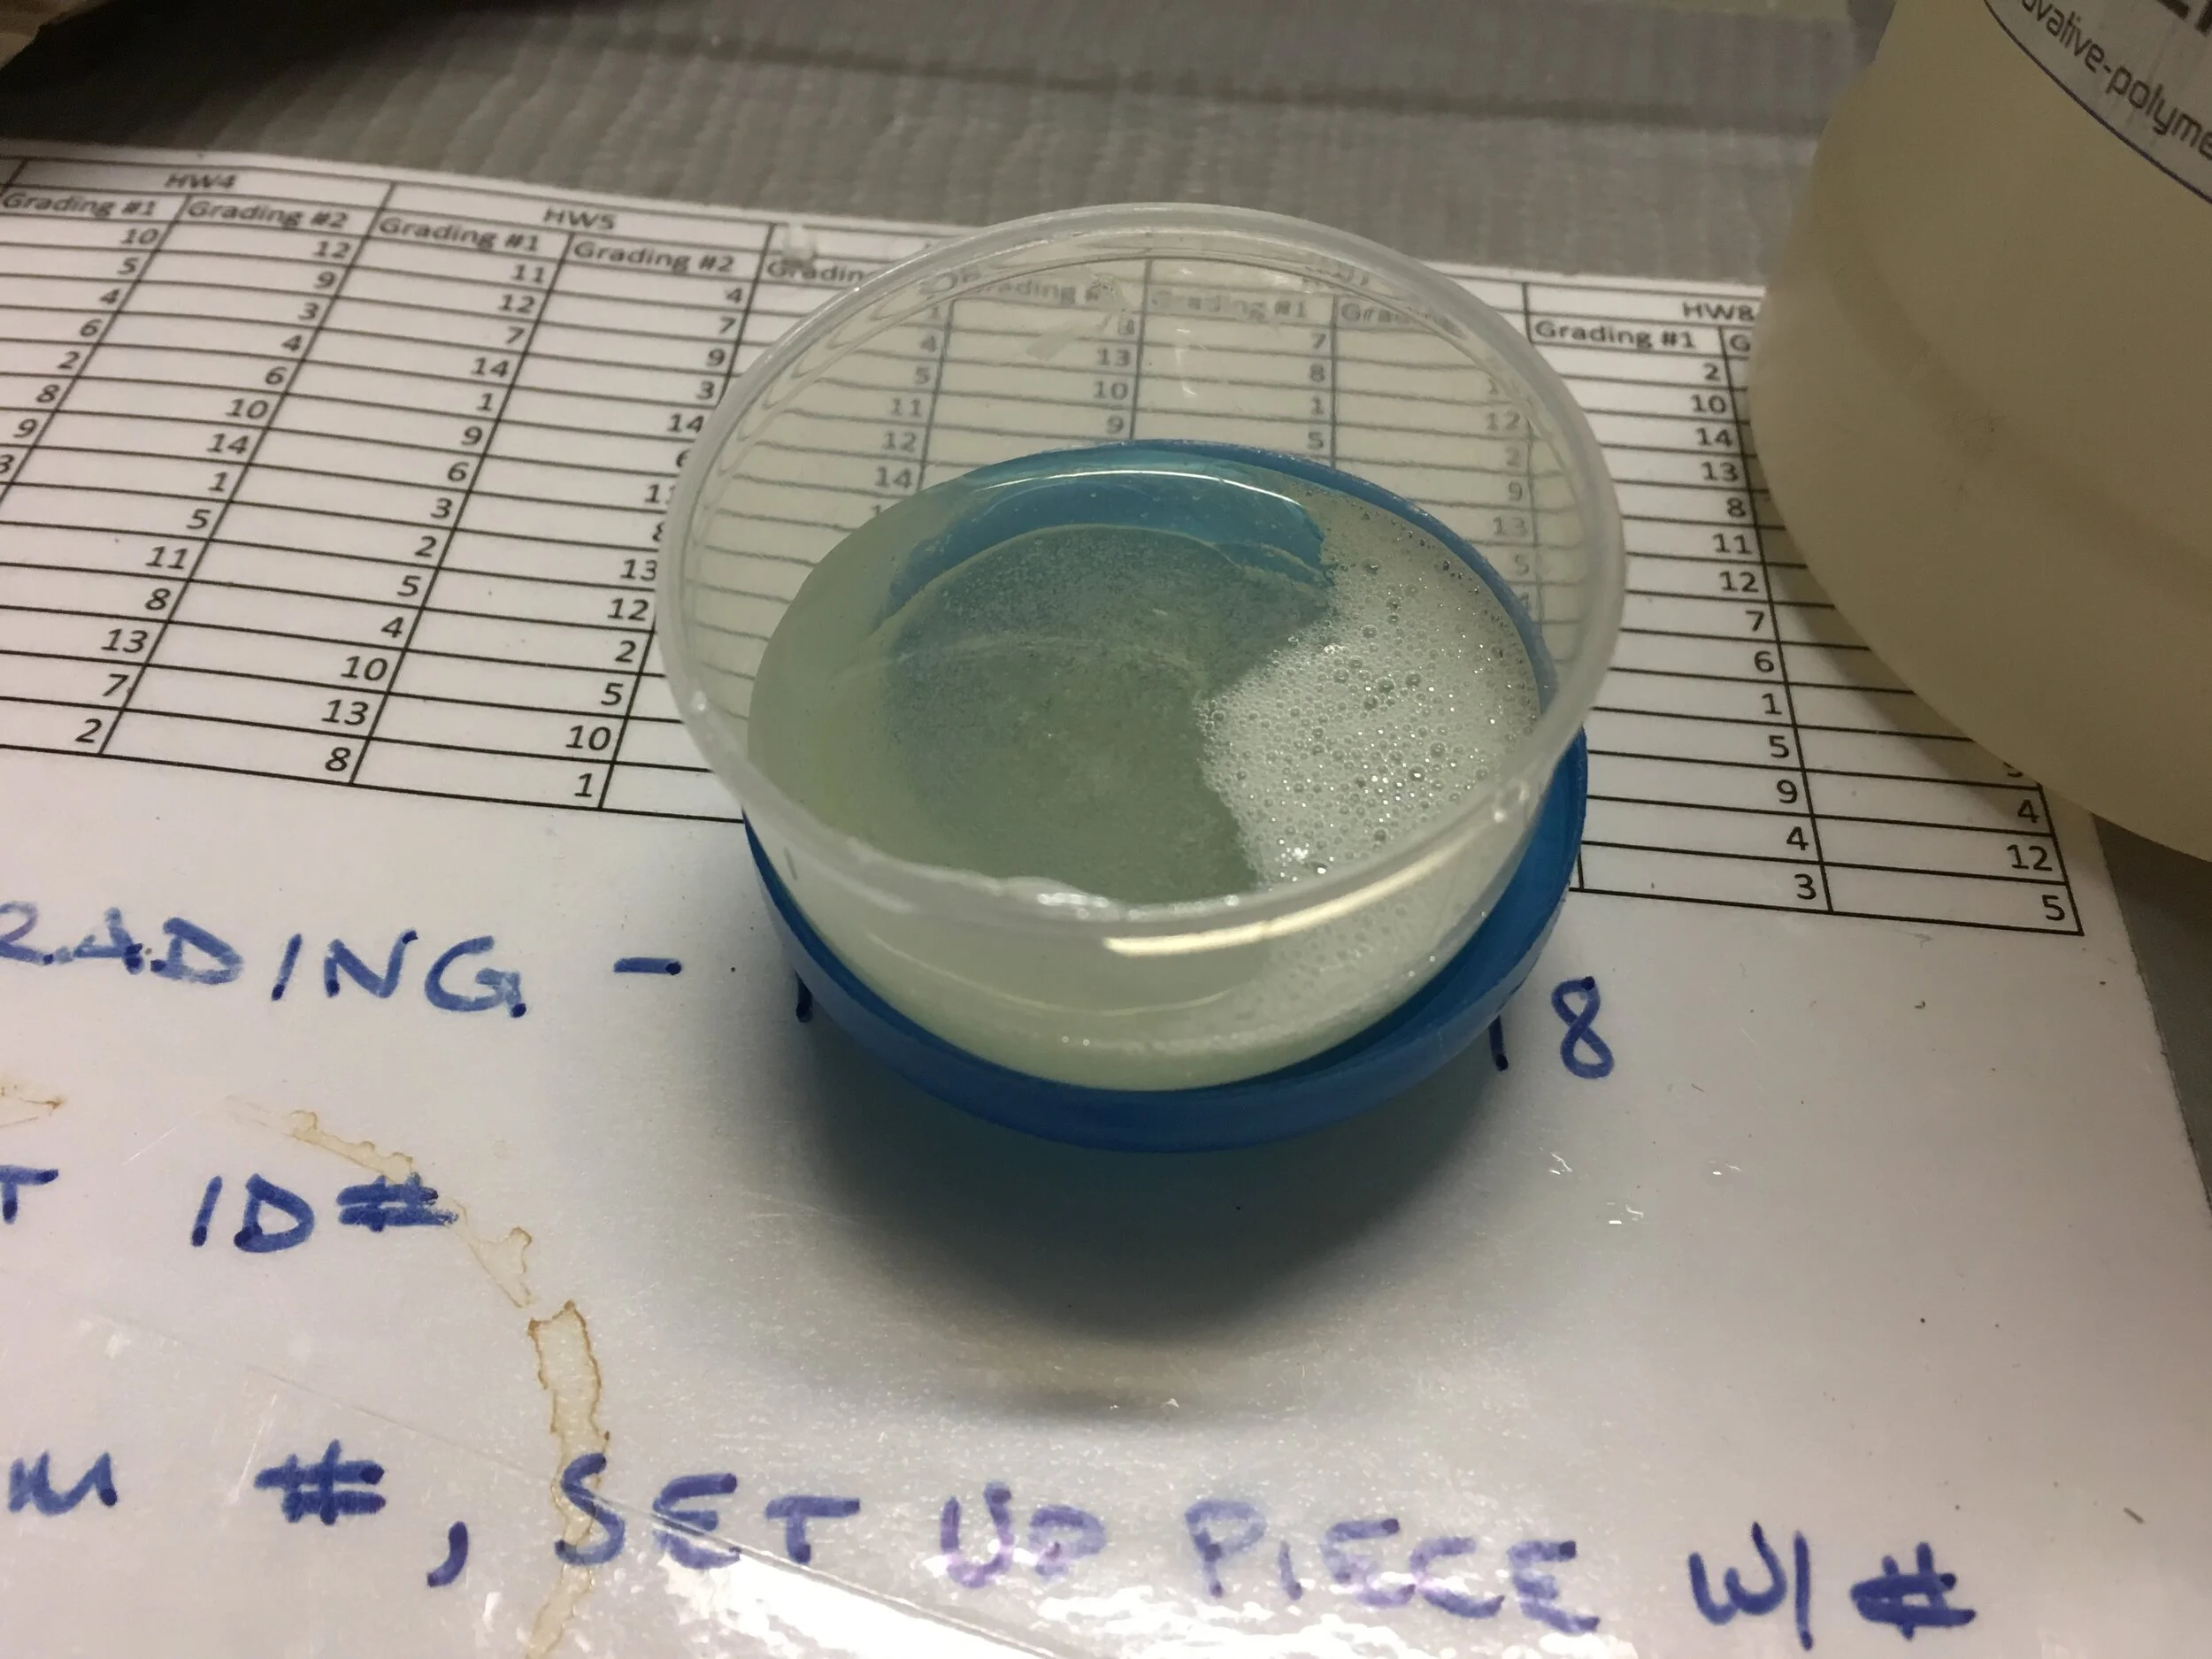
Approximately 2.5 fluid ounces of the blue liquid weighed 3.92 ounces

I managed to measure out 3.93 ounces of green liquid. Not bad!

Mixing!

Mold Release!
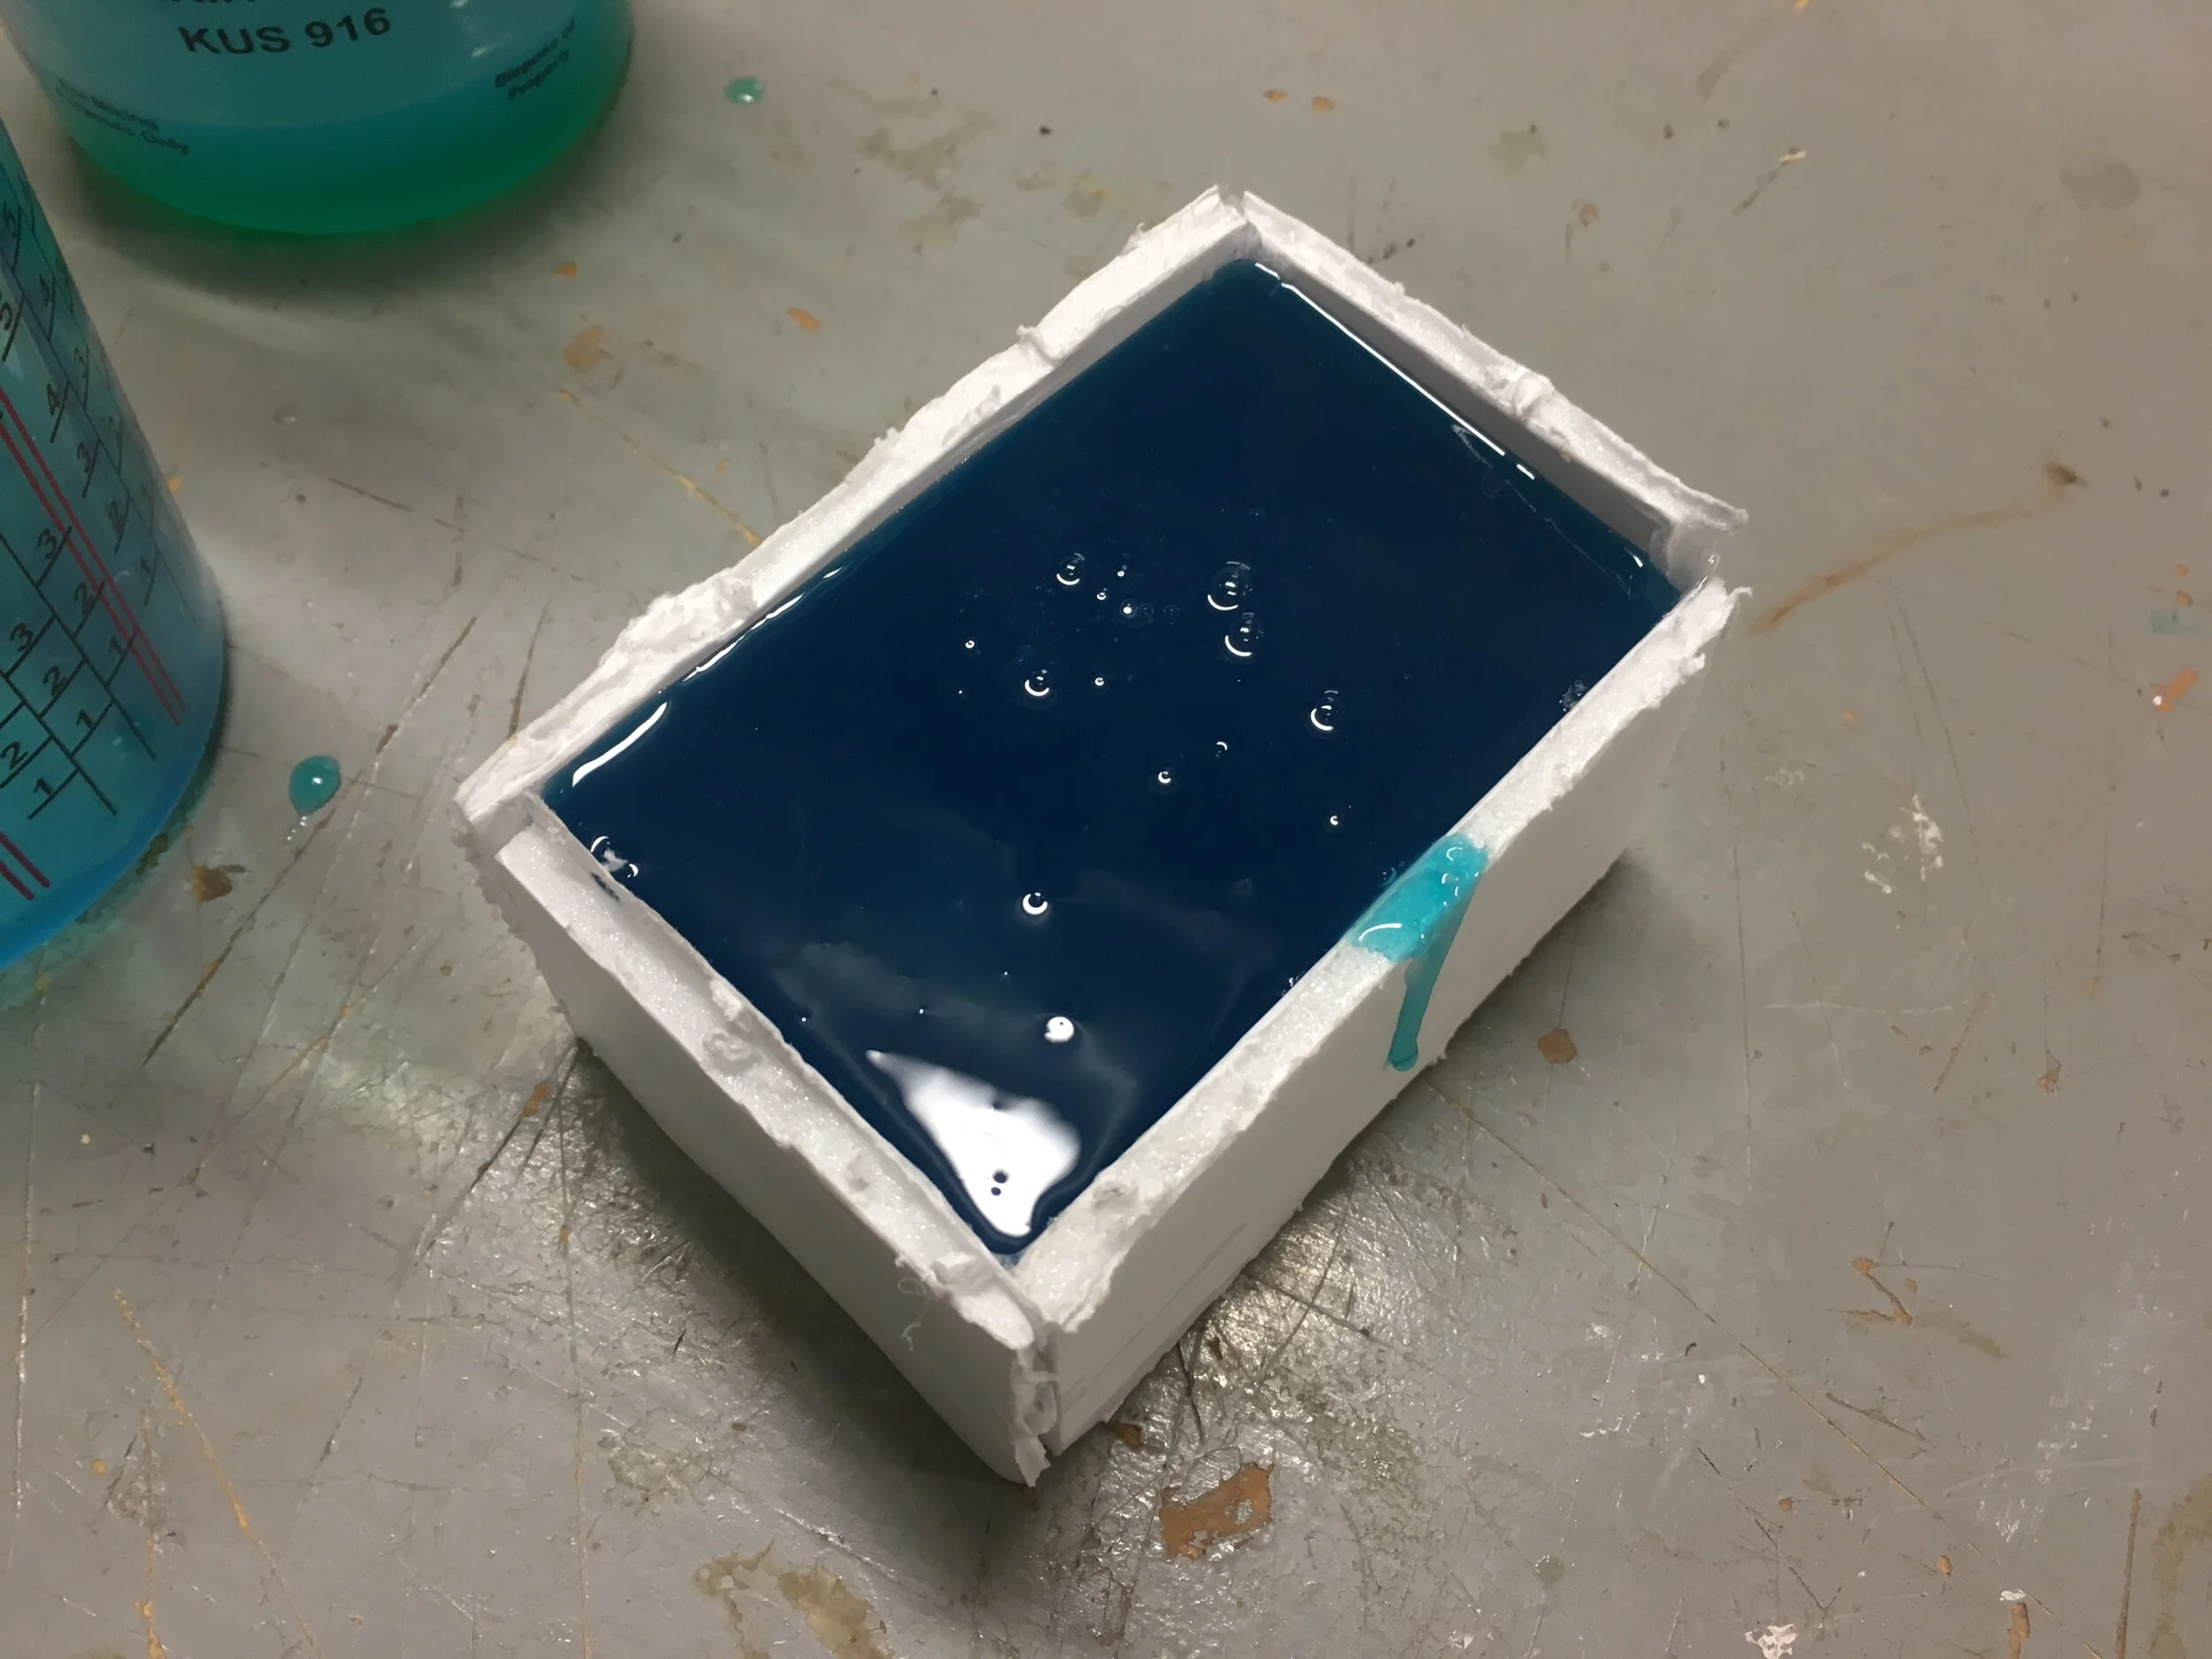
Pouring the liquid silicone into our positive!

Vacuum pumping out any errant air bubbles!

Peeled away from the mold. It looks like a massive gummy vitamin!
lmao

Now that we had a reliable negative molded from the original wooden positive, it was time to cast the final resin chess piece!
Here I am using Solidworks’ volume analysis tool to approximate how much casting resin we’d need.

Measuring out parts A and B for the resin.
One is the actual material, while the other is a hardener that catalyzes the curing process.
This thing cures so fast; one of my friends JM had his mixture ‘freeze’ (cured) mid-pour. Massive F for the guy.
As mentioned before, we sliced away at the silicone mold itself to create a larger fill hole, instead of messing around with CAD again.
I would have done so if this were a mass-produced piece, but for a silly one-off, for an equally silly [class name redacted], I didn’t bother.

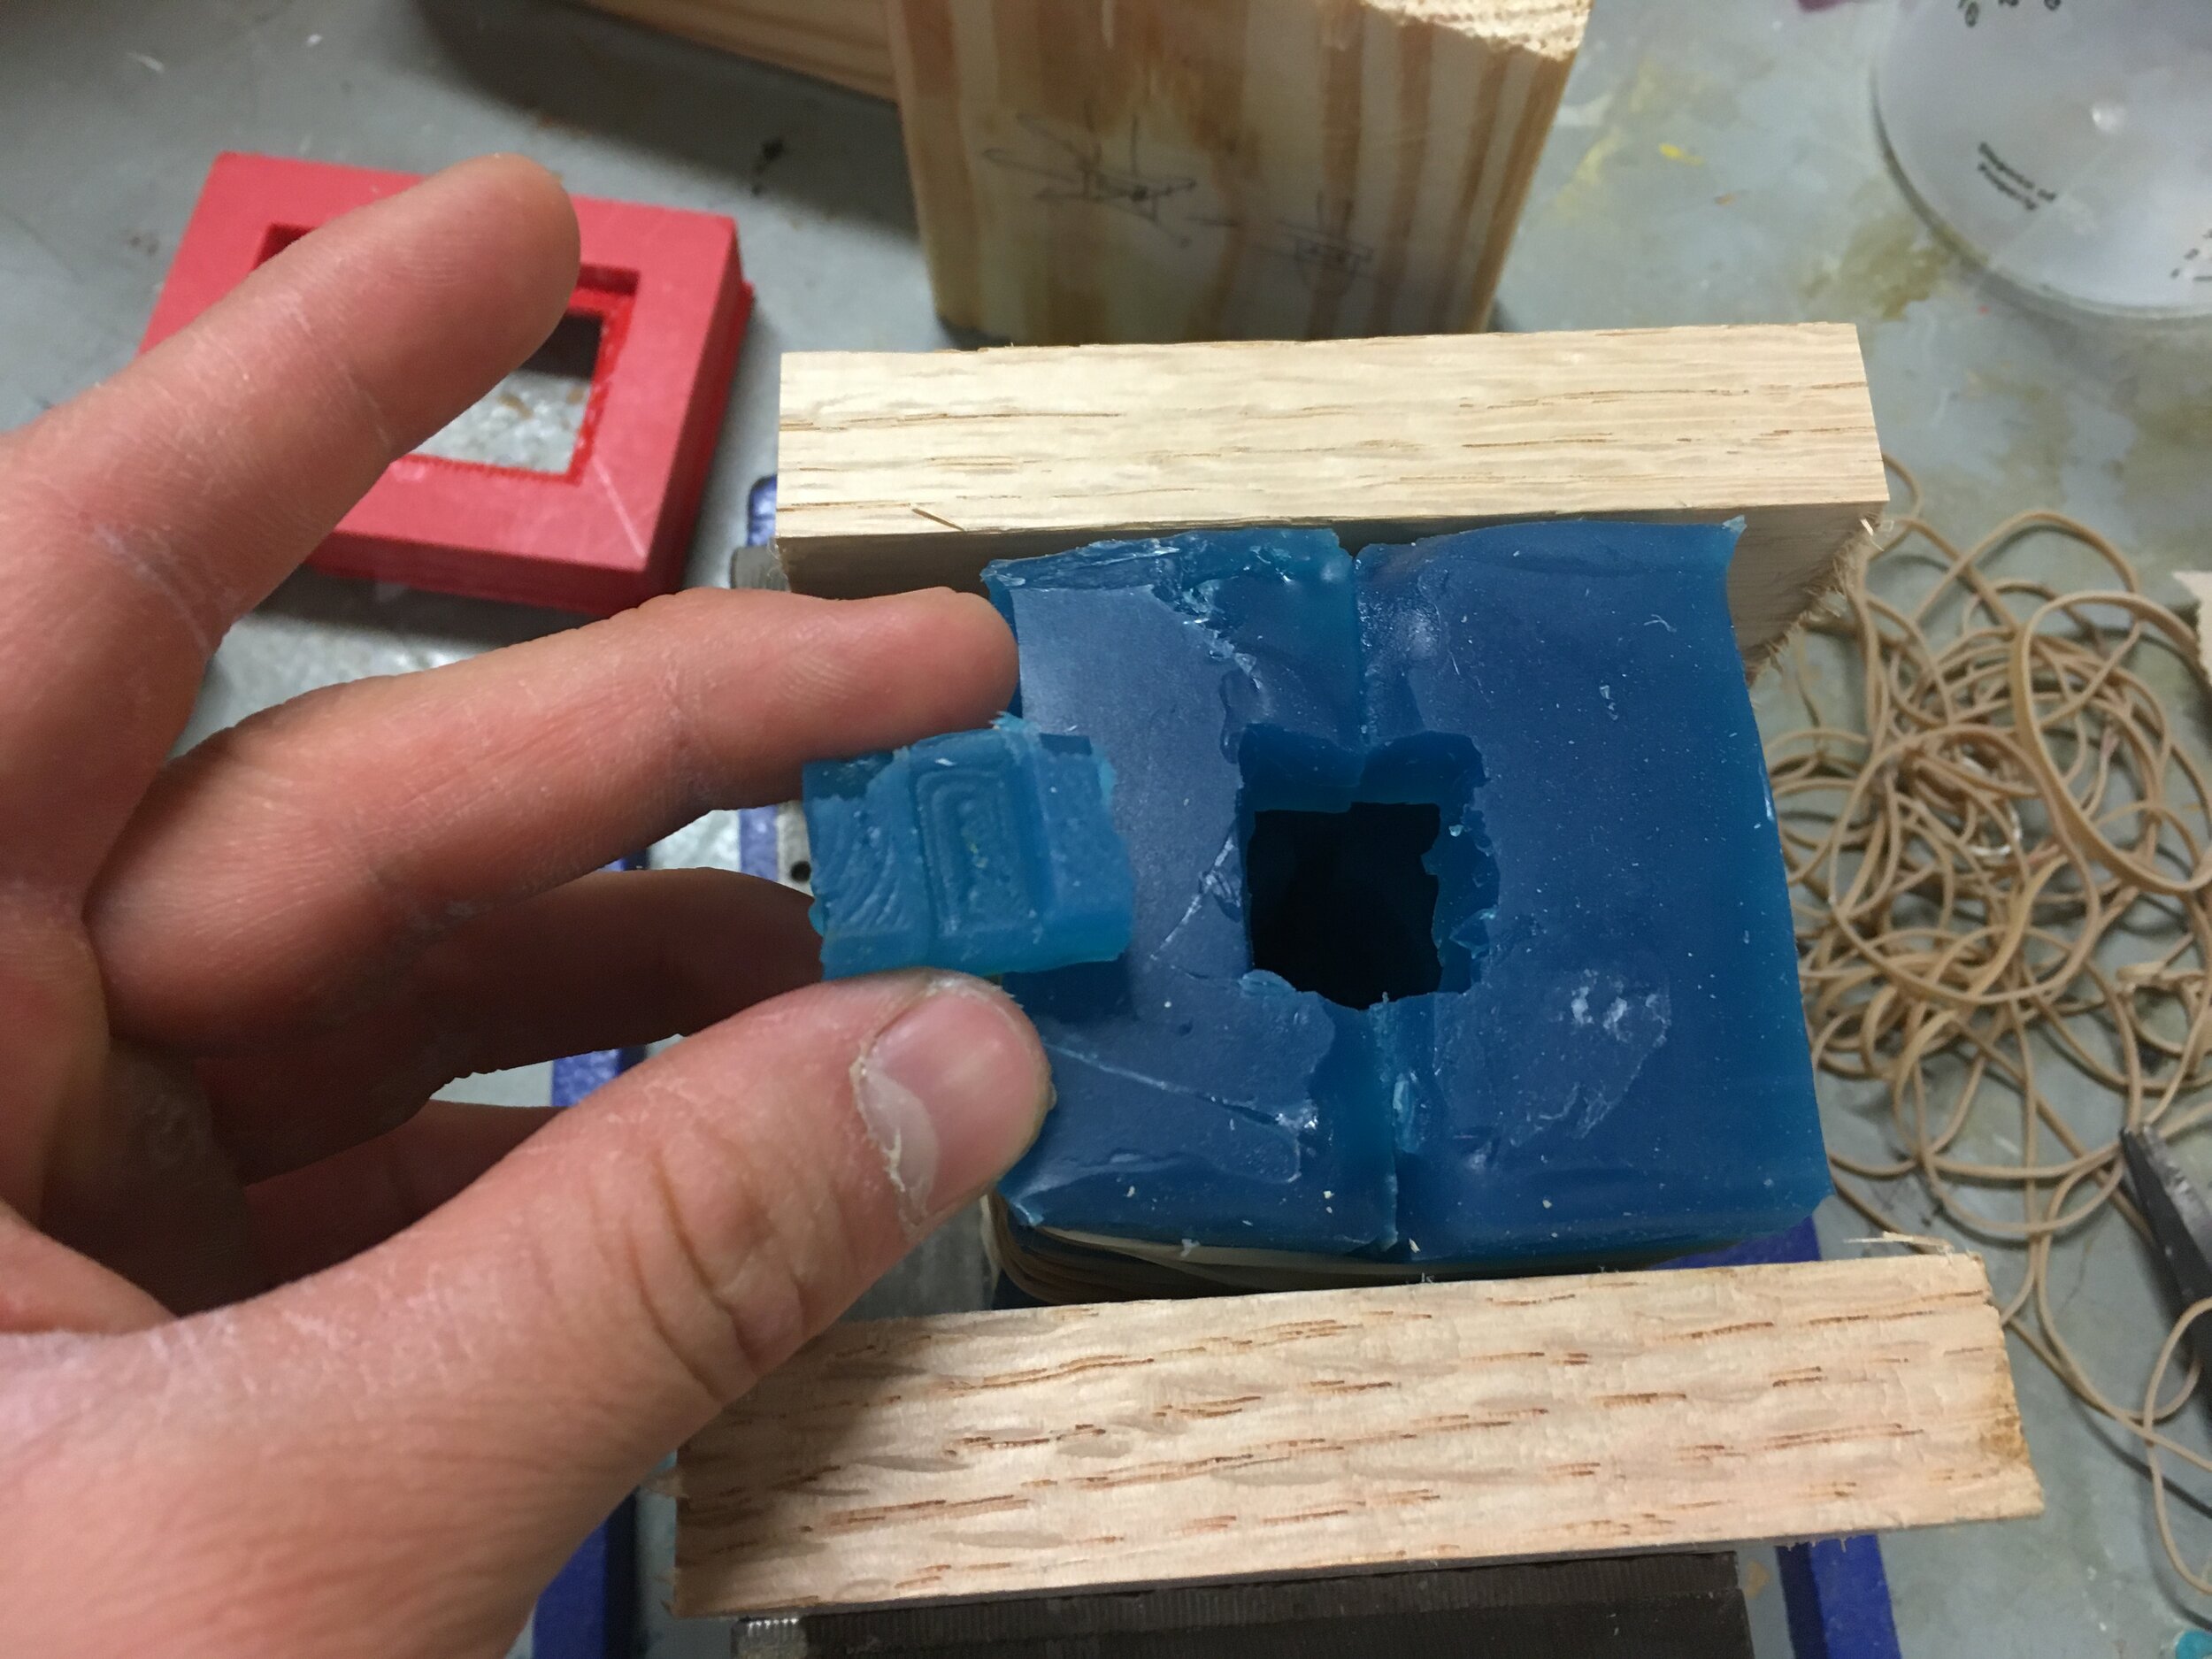
Securing our mold with rubber bands, wood, and a clamp.
Because our side walls still did bow a bit, I used the wood as reinforcement to try and keep the mold more rigid.

Pour + wait half an hour.
Adulfo kind of ASMR-tapped the sides to release trapped air bubbles.
I showered in the meantime.

Ta-dah~

I ran the pieces through a sander to get rid of the fill hole material, and knocked off the seam where the molds joined with a file.
The results were surprisingly fibrous. I can totally see how polyester plastic is spun into thread for fabric now!

Yeehaw
(Also RIP my now-dead laptop)

Adulfo actually went back and casted a second one!
And in full committal to the duck theme, he also painted them with appropriate colors. Ya love to see it

Seriously, these things stick out like such a sore thumb among the more conventional chess pieces everyone else made, so of course, another *smashing* success in my book.
These were really the best middle finger I could give back at the course, and you know what? I had fun doing it.
(I had a kind of sappy end-of-course bit at the end of the original blog post, but those feelings no longer remain, and the section was removed accordingly.)

In the future, I plan to come back and try to do some clear casting (with embeded LEDs!!) with some resin I found. It’ll be a transforming, Gundam Unicorn horn → Kamina glasses setup for the REGALIA helmet!
Check out Adulfo’s sea dragon here! It’s super cool!!